
Growing mushrooms at home might sound like something only a wizard or a hip science teacher would do—but trust me, you don’t need a cauldron or a lab coat. All it takes is a little curiosity, a clean countertop, and a grow bag that does most of the heavy lifting (looking at you, Blue Caterpillar 🐛). Watching those tiny white specks of mycelium transform into full-grown mushrooms is like witnessing nature’s version of slow-motion magic—only this time, you get to eat the results. This guide walks you through the simple steps to turn your kitchen into a mini mushroom farm, no green thumb required.
Sold exclusively at The Hemp Haus
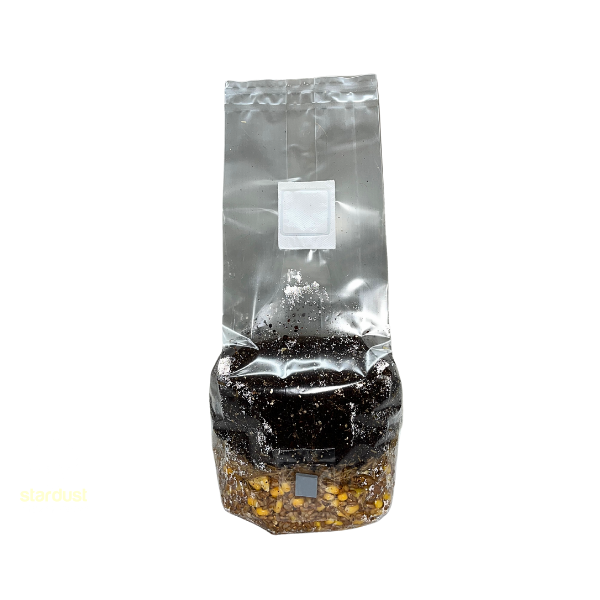
The Blue Caterpillar All-in-One Grow Bag makes mushroom cultivation simple, clean, and reliable. Follow these steps carefully to get healthy, consistent yields.
Clean your countertop or table with bleach or isopropyl alcohol.
A clean area keeps your grow safe from contamination.
Open the package. Inside you’ll find a spore syringe, needle, and alcohol wipe.
Shake the syringe for 10–15 seconds to mix the spores evenly.

Remove the luer lock tip from the syringe.
Take the needle from its wrapper and screw it tightly onto the syringe tip.
Heat the needle with a lighter until it glows bright red.
Let it cool for 15 seconds before use.
Wipe the injection port with the provided alcohol wipe.
Insert the needle through the port and move it side to side while injecting.
4 lb bag: Use ½–1 syringe
6 lb bag: Use 1–2 syringes
Store the bag in a dark place at 70–75°F.
In 7–10 days, white mycelium will start to form.
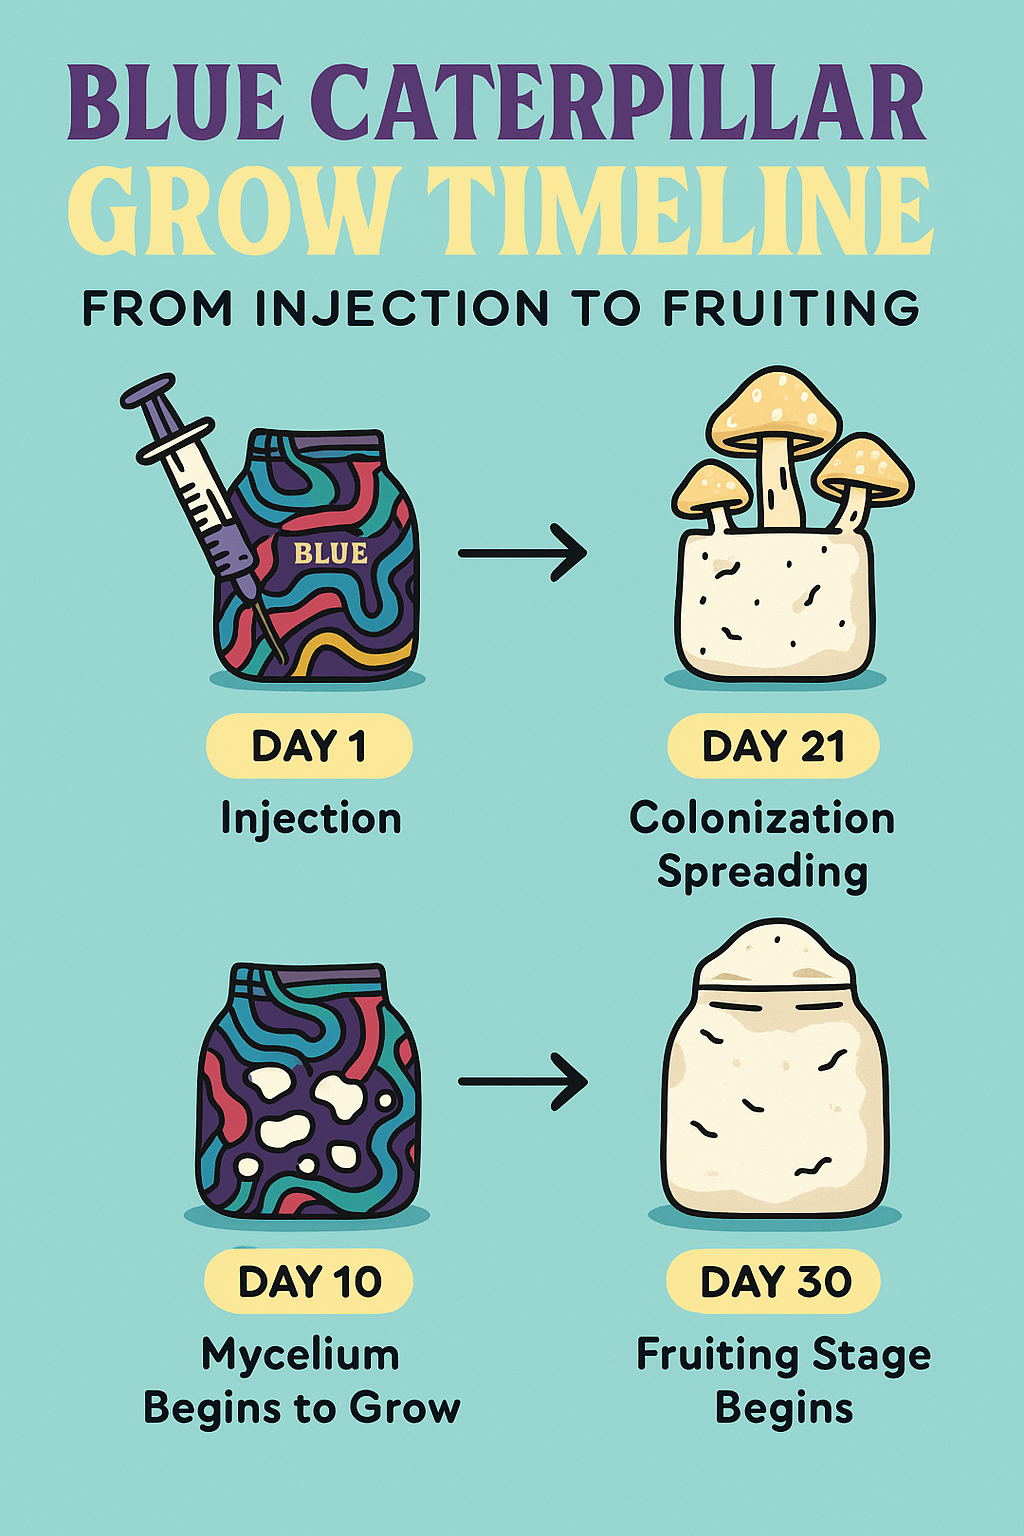
After 14–21 days, when the mycelium forms a ball about the size of a baseball, knead the bag gently.
Mix the grain and substrate completely to promote even growth.
By 21–30 days, your bag should be fully white.
Some strains may take longer — patience pays off.
Place the colonized bag under light or move it to a terrarium.
This helps the substrate form mushrooms on all sides.
In 7–14 days, small brown dots (pins) will appear — your mushrooms are forming.
When mature, open the top of the bag and cut mushrooms close to the substrate.
Pour water into the bag until the block is submerged.
Fold the top, clip or tape it shut for 24 hours, then drain and reseal.
Your bag can produce 2–4 additional flushes before retiring.
| Stage | Ideal Temp (°F) |
|---|---|
| Colonization | 78–80 |
| Fruiting | 68–72 |
Why sterilize the needle?
To prevent contamination. Clean tools = healthy mycelium.
Why mix the bag halfway through?
It spreads growth evenly and strengthens the mycelium.
What if no mushrooms appear?
Check temperature and air exchange. Fresh air and light help trigger fruiting.
Blue Caterpillar grow bags are crafted for easy use and consistent results. Each bag contains a pre-mixed blend of sterilized grain and substrate—ready to inoculate and grow.
These premium grow bags are sold exclusively at The Hemp Haus, ensuring freshness and quality control from start to finish.
Keep your space clean, follow the steps, and enjoy watching nature do its work.
For the best results, always use genuine Blue Caterpillar All-in-One Grow Bags from The Hemp Haus. These directions are intended for gourmet mushrooms only.